进阶
杂知识点
什么是 CPython GIL?
GIL,Global Interpreter Lock,即 全局解释器锁
引入 GIL 是因为 CPython 的内存管理并 不是线程安全 的
为了保护多线程下对 python 对象的访问,每个线程在执行过程中都需要先获取 GIL,保证同一时刻只有一个线程在执行代码
GIL 使得 python 的多线程不能充分发挥多核 CPU 的性能,对 CPU 密集型程序的影响较大
另一种解释
全局解释�器锁 GIL,英文名称为 Global Interpreter Lock,它是解释器中一种线程同步的方式。
对于每一个解释器进程都具有一个 GIL ,它的直接作用是限制单个解释器进程中多线程的并行执行,使得即使在多核处理器上对于单个解释器进程来说,在同一时刻运行的线程仅限一个。 对于 Python 来讲,GIL 并不是它语言本身的特性,而 是 CPython 解释器的实现特性。
Python 代码被编译后的字节码会在解释器中执行,在执行过程中,存在于 CPython 解释器中的 GIL 会致使在同一时刻只有 一个线程 可以执行字节码。 GIL 的存在引起的最直接的问题便是:在一个解释器进程中通过多线程的方式无法利用多核处理器来实现真正的并行。
因此,Python 的多线程是 伪多线程,无法利用多核资源,同一个时刻只有一个线程在真正的运行。
Python 的内存管理
Python 有 内存池机制,Pymalloc 机制,用于对内存的申请和释放管理。
先来看一下为什么有内存池:
- 当创建大量消耗小内存的对象时,c 中频繁调用 new/malloc 会导致大量的内存碎片,致使效率降低。
- 内存池的概念就是预先在内存中申请一定数量的,大小相等的内存块留作备用,当有新的内存需求时,就先从内存池中分配内存给这个需求,不够了之后再申请新的内存。这样做最显著的优势就是能够 减少内存碎片,提升效率。
查看源码,可以看到 Pymalloc 对于小的对象,Pymalloc 会在内存池中申请空间��,一般是少于 236kb,如果是大的对象,则直接调用 new/malloc 来申请新的内存空间。
python 垃圾回收机制
引用计数 为主,标记清除 和 分代回收 为辅
引用计数
引用计数机制是这样的:
- 当对象被创建,被引用,作为参数传递,存储到容器中,引用计数 +1
- 当对象离开作用域,引用指向别的对象,del,从容器中移除,引用计数 -1
- 当引用计数降为 0,python 就会自动回收该对象所在的内存空间,
但是引用计数 无法解决循环引用的问题,所以引入了标记清除和分代回收机制
标记清除
标记清除(Mark-And-Sweep)主要是解决循环引用问题。
标记清除算法是一种基于追踪回收(tracing GC)技术实现的垃圾回收算法。
它分为两个阶段:第一阶段是标记阶段,GC 会把所有的 活动对象 打上标记,第二阶段是把那些没有标记的对象 非活动对象 进行回收。那么 GC 又是如何判断哪些是活动对象哪些是非活动对象的呢?
对象之间通过引用(指针)连在一起,构成一个 有向图,对象构成这个有向图的节点,而引用�关系构成这个有向图的边。从根对象(root object)出发,沿着有向边遍历对象,可达的(reachable)对象标记为活动对象,不可达的对象就是要被清除的非活动对象。根对象就是全局变量、调用栈、寄存器。
分代回收
分代回收是一种以空间换时间的操作方式。
Python 将内存根据对象的存活时间划分为不同的集合,每个集合称为一个代,Python 将内存分为了 3 “代”,分别为年轻代(第 0 代)、中年代(第 1 代)、老年代(第 2 代),他们对应的是 3 个链表,它们的垃圾收集频率与对象的存活时间的增大而减小。
新创建的对象都会分配在年轻代,年轻代链表的总数达到上限时,Python 垃圾收集机制就会被触发,把那些可以被回收的对象回收掉,而那些不会回收的对象就会被移到中年代去,依此类推,老年代中的对象是存活时间最久的对象,甚至是存活于整个系统的生命周期内。同时,分代回收是建立在标记清除技术基础之上。
async 和 await 的作用
async: 声明一个函数为异步函数,函数内只要有 await 就要声明为 async
await: 搭配 asyncio.sleep() 时会切换协程,当切换回来后再继续执行下面的语句
OOP 相关
类变量和实例变量的区别?
- 类变量由所有实例共享,一个对象对其进行修改,其他对象也都会被修改
- 实例变量由实例单独享有,不同实例之间不影响
- 当我们需要在一个类的不同实例之间共享变量的时候使用类变量
classmethod 和 staticmethod 区别?
- 都可以通过
Class.method()的方式使用 - classmethod 第一个参数是 cls,可以引用类变量
- staticmethod 使用起来和普通函数一样,不需要用到类变量,只不过放在类里去组织而已
- classmethod 是 为了使用类变量,staticmethod 是代码组织的需要,完全可以放到类之外
class Person:
    Country = 'china'

    def __init__(self, name, age):
        self.name = name
        self.age = age

    def print_name(self):
        print(self.name)

    @classmethod
    def print_country(cls):
        print(cls.Country)

    @staticmethod
    def join_name(first_name, last_name):
        return print(last_name + first_name)

a = Person("Bruce", "Lee")
a.print_country()
a.print_name()
a.join_name("Bruce", "Lee")
Person.print_country()
Person.print_name(a)
Person.join_name("Bruce", "Lee")
__new__ 和 __init__ 区别?
__new__是一个静态方法,而__init__是一个实例方法.__new__方法会 返回一个创建的实例,而__init__什么都不返回.- 只有在
__new__返回一个 cls 的实例时后面的__init__才能被�调用. - 当创建一个新实例时调用
__new__,初始化一个实例时用__init__.
我们可以做几个有趣的实验。
class Person:
    def __new__(cls, *args, **kwargs):
        print("in __new__")
        instance = super().__new__(cls)
        return instance

    def __init__(self, name, age):
        print("in __init__")
        self._name = name
        self._age = age

p = Person("zhiyu", 26)
print("p:", p)
这段程序输出为:
in __new__
in __init__
p: <__main__.Person object at 0x00000261FE562E50>
可以看到先执行 new 方法创建对象,然后 init 进行初始化。假设将 new 方法中不返还该对象,会有什么结果了?
class Person:
    def __new__(cls, *args, **kwargs):
        print("in __new__")
        instance = super().__new__(cls)
        # return instance

    def __init__(self, name, age):
        print("in __init__")
        self._name = name
        self._age = age

p = Person("zhiyu", 26)
print("p:", p)
发现 如果 new 没有返回实例化对象,init 就没法初始化了。
输出结果为:
in __new__
p: None
什么是元类?
元类 (meta class) 是创建类的类
元类允许我们控制类的生成,比如修改类的属性等
使用 type 来定义元类
元类最常见的一个使用场景就是 ORM 框架
functools.lru_cache() 装饰器
该函数是一个装饰器,为函数提供缓存功能。在下次 以相同参数调用 时直接返回上一次的结果。
例 1:生成第 n 个斐波纳契数,这种慢速递归函数适合使用 lru_cache
import time

def fibonacci(n):
    """斐波那契函数"""
    if n < 2:
        return n
    return fibonacci(n - 2) + fibonacci(n - 1)


if __name__ == '__main__':
    stime = time.time()
    print(fibonacci(34))  # 没有使用缓存,则需要几秒钟的时间
    print("total time is %.3fs" % (time.time() - stime))

# output
# 5702887
# total time is 1.335s
如果没有使用缓存,则需要几秒钟的时间,像下面这样使用缓存后,瞬间就可以计算出结果。
import datetime
import functools

@functools.lru_cache(maxsize=300)
def fibonacci(n):
    """斐波那契函数"""
    if n < 2:
        return n
    return fibonacci(n - 2) + fibonacci(n - 1)
如果使用了 lru_cache,计算用时被大大减少,测试计算时间为 0s。这是因为我们在使用 fibonacci 递归函数时,会重复计算值。使用了 lru_cache 后,所有的重复计算只会执行一次。
注意:
- 缓存是按照参数作为键
- 所有参数必须可哈希 hash,因为缓存实际是存储在字典中,所以使用 list 做参数时就会报错
from functools import lru_cache

@lru_cache(maxsize=100)
def list_sum(nums: list):
    return sum(nums)

# output
# TypeError: unhashable type: 'list'
assert
Python assert(断言)用于判断一个表达式,在表达式条件为 false 的时候触发异常。
断言可以在条件不满足程序运行的情况下直接返回错误,而不必等待程序运行后出现崩溃的情况,例如我们的代码只能在 Linux 系统下运行,可以先判断当前系统是否符合条件。
语法格式如下:
assert expression
等价于:
if not expression:
    raise AssertionError
assert 后面也可以紧跟参数:
assert expression [, arguments]
等价于:
if not expression:
    raise AssertionError(arguments)
以下为 assert 使用实例:
>>> assert True     # 条件为 true 正常执行
>>> assert False    # 条件为 false 触发异常
Traceback (most recent call last):
  File "<stdin>", line 1, in <module>
AssertionError
>>> assert 1==1    # 条件为 true 正常执行
>>> assert 1==2    # 条件为 false 触发异常
Traceback (most recent call last):
  File "<stdin>", line 1, in <module>
AssertionError

>>> assert 1==2, '1 不等于 2'
Traceback (most recent call last):
  File "<stdin>", line 1, in <module>
AssertionError: 1 不等于 2
>>>
以下实例判断当前系统是否为 Linux,如果不满足条件则直接触发异常,不必执行接下来的代码:
import sys
assert ('linux' in sys.platform), "该代码只能在 Linux 下执行"

# 接下来要执行的代码
@abstractmethod 抽象方法
抽象方法 表示基类的一个方法,没有实现,所以 基类不能实例化,子类实现了该抽象方法才能被实例化。
Python 的 abc 提供了 @abstractmethod 装饰器实现抽象方法
下面以 Python3 的 abc 模块举例。
from abc import ABC, abstractmethod


class Foo(ABC):
    @abstractmethod
    def fun(self):
        '''please Implemente in subclass'''


class SubFoo(Foo):
    def fun(self):
        print('fun in SubFoo')

a = SubFoo()
a.fun()
@cached_property
每个实例只计算一次的属性,然后用普通属性替换自身。删除属性将重置属性。
class cached_property(object):
    """
    A property that is only computed once per instance and then replaces itself
    with an ordinary attribute. Deleting the attribute resets the property.
    Source: https://github.com/bottlepy/bottle/commit/fa7733e075da0d790d809aa3d2f53071897e6f76
    """  # noqa

    def __init__(self, func):
        self.__doc__ = getattr(func, "__doc__")
        self.func = func

    def __get__(self, obj, cls):
        if obj is None:
            return self
        value = obj.__dict__[self.func.__name__] = self.func(obj)
        return value
其原理就是 保存到实例字典 __dict__ 中, 避免多次调用重复计算
举个例子
class Test(object):

    test1 = 'aaa'
    def __init__(self):
        self.age = 20

    @cached_property
    def real_age(self):
        return self.age + 19


if __name__ == '__main__':
    t = Test()

    print t.real_age  # 39
    print t.__dict__  # {'real_age': 39, 'age': 20}, 不加装饰器就不存在 __dict__ 中了
typing.TypedDict
class typing.TypedDict(dict)
向字典添加类型提示 的特殊构造。在运行时,它是一个普通的 dict 。
TypedDict 声明了一个字典类型,它期望它的所有实例都有一组特定的键,其中每个键都与一个一致类型的值相关联。这种期望不会在运行时检查,但仅由类型检查器强制执行。用法:
class Point2D(TypedDict):
    x: int
    y: int
    label: str

a: Point2D = {'x': 1, 'y': 2, 'label': 'good'}  # OK
b: Point2D = {'z': 3, 'label': 'bad'}           # Fails type check

assert Point2D(x=1, y=2, label='first') == dict(x=1, y=2, label='first')
允许在不支持的旧版本 Python 中使用此函数 PEP 526,TypedDict 支持另外两种等效的句法形式:
Point2D = TypedDict('Point2D', x=int, y=int, label=str)
Point2D = TypedDict('Point2D', {'x': int, 'y': int, 'label': str})
当键不是一个有效的标识符 / 关键字时,也应该使用函数语法,例如因为它们是关键字或包含连字符。例子:
# raises SyntaxError
class Point2D(TypedDict):
    in: int  # 'in' is a keyword
    x-y: int  # name with hyphens

# OK, functional syntax
Point2D = TypedDict('Point2D', {'in': int, 'x-y': int})
默认情况下,所有键都必须存在于 TypedDict 中。可以通过指定整体来覆盖它。用法:
class Point2D(TypedDict, total=False):
    x: int
    y: int
这意味着 Point2D TypedDict 可以省略任何键。类型检查器仅应支持文字 False 或 True 作为 total 参数的值。 True 是默认值,它使类主体中定义的所有项都成为必需项。
TypedDict 类型可以使用基于类的语法从一个或多个其他 TypedDict 类型继承。用法:
class Point3D(Point2D):
    z: int
Point3D 具有三个项目: x 、 y 和 z 。它等价于这个定义:
class Point3D(TypedDict):
    x: int
    y: int
    z: int
TypedDict 不能从非 TypedDict 类继承,特别是包括 Generic 。例如:
class X(TypedDict):
    x: int

class Y(TypedDict):
    y: int

class Z(object): pass  # A non-TypedDict class

class XY(X, Y): pass  # OK

class XZ(X, Z): pass  # raises TypeError

T = TypeVar('T')
class XT(X, Generic[T]): pass  # raises TypeError
TypedDict 可以通过注解字典 (有关注解最佳实践的更多信息,请参阅注解最佳实践)、__total__、__required_keys__ 和 __optional_keys__ 进行自省。
多等于号表达式
>>> i=7
>>> a=b=c=d=e=f=g=h=i
形如 a=b=c=d...=X
左边不管有多少个变量之间用等于号连接,都仅仅是为了声明
最右边的那个等于号左边的所有变量(a = b = c = d…) 都等于 它右边的那个变量(= X)。
注意,如果最后赋值的是一个列表,前面的变量都会指向一个列表
i=[1,2,3]
a=b=c=i
# 相当于
a=i
b=i
c=i
# 所以他们指向同一个列表
__getattribute__,__getattr__ 与 __setattr__
__getattribute__
官方文档中描述如下:
?imageUrl = https%3A%2F%2Fimg2018.cnblogs.com%2Fblog%2F1606258%2F201902%2F1606258-20190227235511751-1561689135.jpg)
该方法可以拦截对对象属性的所有访问企图,当属性被访问时,自动调用该方法(只适用于新式类)。因此常用于实现一些访问某属性时执行一段代码的特性。
需要注意的是,正式由于它拦截对所有属性的访问(包括对 __dict__ 的访问),在使用中要十分小心地避开无限循环的陷阱。在 __getattribute__ 方法中访问当前实例的属性时,唯一安全的方式是使用基类(超类) 的方法 __getattribute__(使用 super)。例如:
?imageUrl = https%3A%2F%2Fimg2018.cnblogs.com%2Fblog%2F1606258%2F201902%2F1606258-20190228001823704-1074512655.jpg)
通过上图中的代码示例可以看出,一旦实现了 __getattribute__ 方法,所有通过对象访问的属性(包括类属性)都会被拦截,而直接通过类访问类属性则不会。
注意:当访问的属性不存在并重载(覆盖基类对某方法的默认实现)了 __getattribute__ 方法时,该方法不会主动抛出 AttributeError 异常。上图中捕获的 AttributeError 异常,是由基类 __getattribute__ 方法实现并抛出。
常见的错误用法示例:
?imageUrl = https%3A%2F%2Fimg2018.cnblogs.com%2Fblog%2F1606258%2F201902%2F1606258-20190228004359925-759347249.jpg)
在实现 __getattribute__ 方法时访问对象自身的属性,程序陷入无限循环直到崩溃。
__getattr__
官方文档描述如下:
?imageUrl = https%3A%2F%2Fimg2018.cnblogs.com%2Fblog%2F1606258%2F201902%2F1606258-20190228003257402-1419805854.jpg)
__getattr__ 方法的自动执行,需要满足两个条件:
- 访问对象属性;
- 触发 AttributeError 异常。
代码示例如下:
?imageUrl = https%3A%2F%2Fimg2018.cnblogs.com%2Fblog%2F1606258%2F201902%2F1606258-20190228012749904-1702916869.jpg)
上图中,调用不存在的 job 属性首先调用 __getattribute__ 方法(如果该方法未定义,会调用基类的 __getattribute__ 方法),触发 AttributeError 异常并自动捕获,然后才调用 __getattr__ 方法。
错误用法示例如下:
?imageUrl = https%3A%2F%2Fimg2018.cnblogs.com%2Fblog%2F1606258%2F201902%2F1606258-20190228013524395-1514972473.jpg)
重载了 __getattribute__ 方法,却没有主动抛出 AttributeError 异常的机制,或者抛出一个其它类型的异常,__getattr__ 方法都不会执行
__setattr__
?imageUrl = https%3A%2F%2Fimg2018.cnblogs.com%2Fblog%2F1606258%2F201902%2F1606258-20190228013939475-1601706771.jpg)
试图给属性赋值时自动调用该方法,例如:
?imageUrl = https%3A%2F%2Fimg2018.cnblogs.com%2Fblog%2F1606258%2F201902%2F1606258-20190228020837089-313560767.jpg)
之所以会执行三次 print 函数,是因为在 __init__ 方法中,对象 A 初始化时给属性 name 和 age 赋值时,触发了 __setattr__ 方法。使用该方法是同样需要十分小心避免无�限循环陷阱。
错误用法示例如下:
?imageUrl = https%3A%2F%2Fimg2018.cnblogs.com%2Fblog%2F1606258%2F201902%2F1606258-20190228021331657-944987695.jpg)
可以看出,在 __setattr__ 方法中,不能直接给属性赋值,而通常的做法是 使用 __dict__ 魔法属性。
__dict__ 属性是一个字典,所有的实例属性都存储在这个字典中,而修改 __dict__ 字典中的键值对成员不会触发 __setattr__ 方法,这里应注意与直接修改 __dict__ 的值的区别。
注意:如果定义 __setattr__ 方法的同时定义了 __getattribute__ 方法,那么在修改 __dict__ 字典中的键值对时,由于调用了 self.__dict__ 属性,同样会触发 __getattribute__ 方法,使用时应格外小心。代码示例如下:
?imageUrl = https%3A%2F%2Fimg2018.cnblogs.com%2Fblog%2F1606258%2F201902%2F1606258-20190228023113726-1040716447.jpg)
上图示例代码中,每调用一次 __setattr__ 就会调用一次 __getattribute__。
注意赋值语句与属性调用的区别:self.__dict__ = {} 是赋值语句,不会触发 __getattribute__ 方法,但触发 __setattr__ 方法;self.__dict__[name] = value 语句,先调用 self.__dict__ 属性,得到 dict 对象后再修改其成员,因此会触发 __getattribute__ 方法。
__enter__ 与 __exit__
在 python 中实现了 __enter__ 和 __exit__ 方法,即 支持上下文管理器协议。
上下文管理器就是支持上下文管理器协议的对象,它是为了 with 而生。
- 当 with 语句在开始运行时,会在上下文管理器对象上调用
__enter__方法。 - with 语句运行结束后,会在上下文管理器对象上调用
__exit__方法
with 的语法:
with EXPR as VAR:
    BLOCK
这是上面语法的伪代码:
mgr = (EXPR)
exit = type(mgr).__exit__  # Not calling it yet
value = type(mgr).__enter__(mgr)
exc = True
try:
    try:
        VAR = value  # Only if "as VAR" is present
        BLOCK
    except:
        # The exceptional case is handled here
        exc = False
        if not exit(mgr, *sys.exc_info()):
            raise
        # The exception is swallowed if exit() returns true
finally:
    # The normal and non-local-goto cases are handled here
    if exc:
        exit(mgr, None, None, None)
- 生成上下文管理器 mgr
- 如果没有发现
__exit__,__enter__两个方法,解释器会抛出 AttributeError 异常 - 调用上下文管理器的
__enter__()方法 - 如果语法里的 as VAR 没有写,那么伪代码里的 VAR = 这部分也会同样被忽略
- 如果 BLOCK 中的代码正常结束,或者是通过 break,continue,return 来结束,
__exit__()会使用三个 None 的参数来返回 - 如�果执行过程中出现异常,则使用
sys.exc_info的异常信息为参数调用__exit__(exc_type, exc_value, exc_traceback)
之前我们对文件的操作是这样的:
try:
    f = open('filename')
except:
    print("Unexpected error:", sys.exc_info()[0])
else:
    print(f.readlines())
    f.close()
现在有了 with 语句可以使代码更加简洁,减少编码量, 下面的语句会在执行完后自动关闭文件(即使出现异常也会):
with open('example.info', 'r') as f:
    print(f.readlines())
一个例子:
class TmpTest:
    def __init__(self,filename):
        self.filename=filename
    def __enter__(self):
        self.f = open(self.filename, 'r')
        return self.f
    def __exit__(self, exc_type, exc_val, exc_tb):
        self.f.close()

test=TmpTest('file')

with test as t:
    print ('test result: {}'.format(t))返回:
返回:
test result: None
如果在 __init__ 或者 __enter__ 中抛出异常,则不会进入到 __exit__ 中:
class TmpTest:
    def __init__(self,filename):
        self.filename=filename
        print("__init__")
        raise ImportError
    def __enter__(self):
        self.f = open(self.filename, 'r')
        print("__enter__")
        return self.f
    def __exit__(self, exc_type, exc_val, exc_tb):
        print("__exit__")
        self.f.close()


test = TmpTest('file')
with test as t:
    print ('test result: {}'.format(t))
返回:
__init__
Traceback (most recent call last):
  File "D:/pythonScript/leetcode/leetcode.py", line 14, in <module>
    test=TmpTest('file')
  File "D:/pythonScript/leetcode/leetcode.py", line 5, in __init__
    raise ImportError
ImportError
如果在 __exit__ 中返回 True,则不会产生异常:
class TmpTest:
    def __init__(self,filename):
        self.filename=filename
        print("__init__")

    def __enter__(self):
        self.f = open(self.filename, 'r')
        print("__enter__")
        return self.f

    def __exit__(self, exc_type, exc_val, exc_tb):
        print("__exit__ {} ".format(exc_type))
        self.f.close()
        return True

test=TmpTest('file')
with test as t:
    print ('test result: {}'.format(t))
    raise ImportError
print("no error")
返回:
__init__
__enter__
test result: <_io.TextIOWrapper name='file' mode='r' encoding='cp936'>
__exit__ <class 'ImportError'>
no error
结构化模式匹配
Structural Pattern Match
Python 3.10 的新特性
在模式匹配出现之前,对于分支相当多的判断语句,Python 建议通过 字典映射(dictionary mapping)来实现。
旧方法:字典映射
def function_map(option):
     return {
            1: lambda : print('You have chose option 1.'),
            2: lambda : print('You have chose option 2.'),
            3: lambda : print('You have chose option 3.')
            }.get(option, lambda: print('Sorry you chose an invalid option.'))

function_map(3)()
借助字典这种数据结构,以匹配条件作为键值,一一对应匹配后需要执行的命令。将 switch 结构中的条件判断转化为对字典键值的搜索匹配。
Pattern Match
用模式匹配实现 switch-case 语法,从形式上看就直观了很多:
option = 3

match option:
    case 1:
        print("You have chosen option 1.")
    case 2:
        print("You have chosen option 2.")
    case 3:
        print("You have chosen option 3.")
    case _:
        print("You chose an invalid option.")
实际上模式匹配不只有创建流程上的分支结构这一种功能,它的作用可以比单纯的 switch-case 语法强大的多。
模式匹配其实可以拆成两部分来理解:匹配和模式。
- 匹配部分可以发挥类似于
if-else和switch等条件判断语句的作用,生成一种分支结构; - 模式则定义了特定的规则即匹配的具体条件。更进一步的,还会对匹配到的对象进行 解构(destructuring)或者说 拆包(unpacking)
以不同于模式匹配的正则表达式来说:
import re

source_str = 'cats are cute'
pattern = re.compile('(.*) are (.*)')

matched = re.match(pattern, source_str)
print(matched.groups())
# => ('cats', 'cute')
正则表达式规则中的 (.*) 分别匹配到源字符串中的 cats 和 cute,与此同时,还把这两个匹配项提取了出来。
而模式匹配相对来说,则不仅仅能够匹配和提取 cats、cute 等字符串类型,还能够匹配更复杂类型的对象,同时对匹配到的对象进行拆包操作
比如下面的代码就对类型为元组的对象进行了匹配和拆包:
def match_person(person):
    match person:
        case (name, 'M', age):
            print(f'He is {name}, aged {age}.')
        case (name, 'F', age):
            print(f'She is {name}, aged {age}.')
        case (name,):
            print(f'We only know the name is {name}, others are secrets.')

person_A = ('John', 'M', 20)
person_B = ('Jenny', 'F', 18)
person_C = ('Lily',)

match_person(person_A)
# => He is John, aged 20.
match_person(person_B)
# => She is Jenny, aged 18.
match_person(person_C)
# => We only know the name is Lily, others are secrets.
⭐ match 关键字后面被匹配的对象,支持很多种复杂的类型。对应的 case 关键字后面的模式也同样灵活:
- 列表或元组,如
(name, 18) - 字典,如
{"name": name, "age": 18} - 使用
*匹配列表中的剩余部分,如[first, *rest] - 使用
**匹配字典中的剩余部分 - 匹配对象和对象的属性
- 在模式中可以使用
|逻辑或操作
模式匹配应用实例
创建一个 Python 程序,模拟交互式命令行的行为。
匹配字符串
def run_command(command: str) -> None:
    match command:
        case "quit":
            print("Quitting the program.")
            quit()
        case "reset":
            print("Resetting the system.")
        case other:
            print(f"Unknown command: {other!r}.")

def main() -> None:
    while True:
        command = input("$ ")
        run_command(command)


if __name__ == '__main__':
    main()
运行效果如下:
$ reset
Resetting the system.
$ abcdefg
Unknown command: 'abcdefg'.
$ quit
Quitting the program.
匹配列表
def run_command(command: str):
    match command.split():
        case ["load", filename]:
            print(f"Loading file: {filename}.")
        case ["save", filename]:
            print(f"Saving to file: {filename}.")
        case ["quit" | "exit" | "bye"]:
            print("Quitting the program.")
            quit()
        case _:
            print(f"Unkown command: {command!r}.")


def main() -> None:
    while True:
        command = input("$ ")
        run_command(command)


if __name__ == '__main__':
    main()
运行效果:
$ load input_data.txt
Loading file: input_data.txt.
$ save output_data.txt
Saving to file: output_data.txt.
$ load input_data.txt output_data.txt
Unkown command: 'load input_data.txt output_data.txt'.
$ bye
Quitting the program.
匹配对象
from dataclasses import dataclass
from typing import List
import shlex


@dataclass
class Command:
    command: str
    arguments: List[str]


def run_command(command: Command):
    match command:
        case Command(command="load", arguments=[filename]):
            print(f"Loading file: {filename}.")
        case Command(command="save", arguments=[filename]):
            print(f"Saving to file: {filename}.")
        case Command(command="quit" | "exit" | "bye", arguments=["--force" | "-f"]):
            print("Sending SIGTERM and quitting the program.")
            quit()
        case Command(command="quit" | "exit" | "bye"):
            print("Quitting the program.")
            quit()
        case _:
            print(f"Unknown command: {command!r}.")


def main() -> None:
    while True:
        command, *arguments = shlex.split(input("$ "))
        run_command(Command(command, arguments))


if __name__ == '__main__':
    main()
运行效果:
$ not a command
Unknown command: Command(command='not', arguments=['a', 'command']).
$ load input_data.txt
Loading file: input_data.txt.
$ save output_data.txt
Saving to file: output_data.txt.
$ exit -f
Sending SIGTERM and quitting the program.
假如 case Command(command="quit" | "exit" | "bye") 为规则 1,Command(command="quit" | "exit" | "bye", arguments=["--force" | "-f"]) 为规则 2。
则更具体一些的规则 2 要放在规则 1 前面。
⭐ 因为模式匹配是 从上到下依次 检查每一个 case 语句,若遇到匹配的模式,则执行对应的命令。不再继续向下匹配。
由于严格符合规则 2 的对象一定也符合规则 1,当规则 1 位于规则 2 前面时,规则 2 永远也没有被匹配的机会。
可以想象成一种逐渐“滑落”的过程。比如写一个计算成绩等级的函数,可以这样实现:
def grade(score):
    if score >= 90:
        return 'A'
    elif score >= 70:
        return 'B'
    elif score >= 60:
        return 'C'
如果上面 if-else 的条件反着排,那就,所有人都是 C 了
装饰器进阶
几个常用的用途:
- 性能分析(计时器)
- 记录日志
- 实现单例模式
- 缓存(如 cache_lru)
一般装饰器
def debug(func):
    # debug 这一层的代码,会在函数定义时运行
    def wrapper():
        print("[DEBUG]: enter {}()".format(func.__name__))
        return func()
    return wrapper

@debug
def hello():
    print("hello~")

hello()
# hello 本身是一个函数,实际上就是 debug.wrapper
# 函数定义时运行:hello = debug(hello)


-----------------------------
>>>[DEBUG]: enter hello()
>>>hello~
带参数的装饰器
def logging(level):
    def outwrapper(func):
        # outwrapper 这一层的代码,会在函数定义时运行
        def wrapper(*args, **kwargs):
            print("[{0}]: enter {1}()".format(level, func.__name__))
            return func(*args, **kwargs)
        return wrapper
    return outwrapper

@logging(level="INFO")
def hello(a, b, c):
    print(a, b, c)

# 函数定义时运行:hello = logging("INFO")(hello)

hello("hello,","good","morning")


-----------------------------
>>>[INFO]: enter hello()
>>>hello, good morning
装饰器不一定会执行被装饰的函数
global_handlers = {}


def out(handler_name):
    def inner(func):
        # 在函数定义时运行
        print('defining {}, {}'.format(func.__name__, handler_name))
        global_handlers[handler_name] = func
        # 这里通常会有一个匿名函数 wrapper,然后返回这个 wrapper
        # def wrapper(*args, **kwargs):
        # 		...
        # return wrapper
    return inner

# 在定义 mul 和 sub 的时候,实际上已经执行了 out.inner
@out("handler1")
def mul(a: int, b: int) -> int:
    return a * b

# mul = out("handler1")(mul) 实际上为 None

@out("handler2")
def sub(a: int, b: int) -> int:
    return a - b

print(global_handlers)

print(global_handlers["handler1"](2, 3))
print(global_handlers["handler2"](2, 3))

print(mul)
print(sub)

-----------------------------
>>>defining mul, handler1
>>>defining sub, handler2
>>>{'handler1': <function mul at 0x7fb908aa9160>, 'handler2': <function sub at 0x7fb908aa91f0>}
>>>6
>>>-1
>>>None
>>>None
类装饰器
class logging(object):
    def __init__(self, func):
        self.func = func

    def __call__(self, *args, **kwargs):
        print("[DEBUG]: enter {}()".format(self.func.__name__))
        return self.func(*args, **kwargs)

@logging
def hello(a, b, c):
    print(a, b, c)
# hello = logging(hello) 现在 hello 是一个 logging 实例而不是一个函数了

hello("hello,","good","morning")


-----------------------------
>>>[DEBUG]: enter hello()
>>>hello, good morning
带参数的类装饰器
class logging(object):
    def __init__(self, level):
        self.level = level

    def __call__(self, func):
        def wrapper(*args, **kwargs):
            print("[{0}]: enter {1}()".format(self.level, func.__name__))
            return func(*args, **kwargs)
        return wrapper

@logging(level="TEST")
def hello(a, b, c):
    print(a, b, c)

# hello = logging("TEST")(hello) 现在 hello 仍是一个函数,即 __call__ 返回的那个 wrapper

hello("hello,","good","morning")


-----------------------------
>>>[TEST]: enter hello()
>>>hello, good morning
对象装饰器
class Manager(object):

    def __init__(self):
        self.handler_map = {}

    def __call__(self, handler_name: str):
        def inner(func):
            self.handler_map[handler_name] = func
        return inner

    def do_execute(self, a: int, b: int):
        for handler_name, func in self.handler_map.items():
            print(f"现在我正在执行: {handler_name}: {func.__name__}")
            print(func(a, b))

def run1(reg: Manager):
    @reg('mul')
    def mul(a: int, b: int):
        return a * b

    # mul = reg('mul')(mul)
    # mul 被记录进 reg.handler_map 中


    @reg('sub')
    def sub(a: int, b: int):
        return a - b


def run2(reg: Manager):

    @reg('add')
    def add(a: int, b: int):
        return a + b

    @reg('sub')
    def sub(a: int, b: int):
        print("I am a new sub")
        return a - b

reg = Manager()
run1(reg)
run2(reg) # run2 中的 sub 会覆盖 run1 中的 sub

print(reg.handler_map)
reg.do_execute(2,3)
Mixin 类的组合思想
类有下面的继承关系
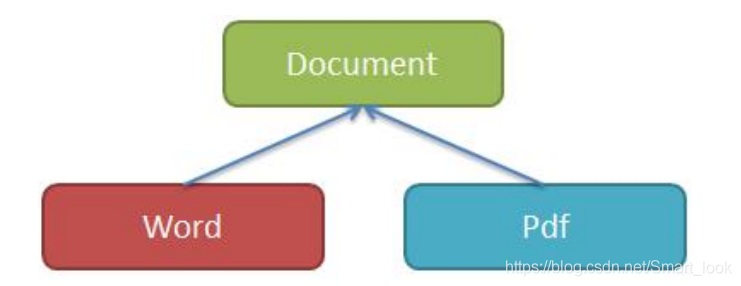
文档 Document 类是其他所有文档类的抽象基类,Word、Pdf 类是 Document 的子类
需求:为 Document 子类提供打印能力
在基类中中提供功能
class Document:

    def __init__(self,content):
        self.coutent = content

    def print(self):
        print(self.coutent)

class Word(Document): pass

class Pdf(Document):  pass

a = Word("tom com")
a.print()   #   tom com
基类提供的方法不应该具体实现,因为它未必适合子类的打印,子类中需要覆盖重写。
print 算是一种能力(打印功能),不是所有的 Document 的子类都需要的,所以,从这个角度出发有点问题
class Document:

    def __init__(self,content):
        self.coutent = content

    def print(self):
        print(self.coutent)

class Word(Document):
    def print(self):
        print("Word print {}".format(self.coutent))

class Pdf(Document):  pass

a = Word("tom com")
a.print()   #   Word print tom com
在需要子类上添加功能
如果现有子类上直接增加,违反了 OCP 的原则,所以应该继承后增加

class Document:        # 不允许修改
    def __init__(self,content):
        self.coutent = content

    def print(self):
        print(self.coutent)

class Word(Document): pass    # 不允许修改

class Pdf(Document):  pass    #    不允许修改

class PrinttableWord(Word):
    def print(self):
        print("PrinttableWord print {}".format(self.coutent))

print(PrinttableWord.mro()) #   [<class '__main__.PrinttableWord'>, <class '__main__.Word'>, <class '__main__.Document'>, <class 'object'>]
a = PrinttableWord("tom com")
a.print()   #   PrinttableWord print tom com
看似不错,如果还要提供其他类似能力,如何继承?
- 应用于网络,文档应该具备序列化的能力,类上就应该实现序列化可序列化还可能分为使用 pickle、josn、messagepack 等
这个时候,发现,类又可能太多了,继承的方式不是很好了
功能太多,A 类需要某几样功能,B 类需要另外几样功能,很繁琐
装饰器
用装饰器增强一个类,把功能给类附加上去,哪个类需要,就装饰它
def printable(cls):
    def _print(self):
        print("_print 装饰器 {}".format(self.coutent))
        return _print
    cls.print = _print
    return cls

class Document:
    def __init__(self,content):
        self.coutent = content

    def print(self):
        print(self.coutent)

class Word(Document): pass

class Pdf(Document):  pass

@printable
class PrinttableWord(Word): pass    #先继承,后装饰


print(PrinttableWord.__dict__)  #   {'__module__': '__main__', '__doc__': None, 'print': <function printable.<locals>._print at 0x0173C228 >}
a = PrinttableWord("tom")
a.print()   #   _print 装饰器 tom
优点:简单方便,在需要的地方动态增加
Mixin 用类去继承
先看代码
class PrintableMixin:
    def print(self):
        print("PrintableMixin {}".format(self.coutent))

class Document:
    def __init__(self,content):
        self.coutent = content

    def print(self):
        print(self.coutent)

class Word(Document): pass

class Pdf(Document):  pass


class PrinttableWord(PrintableMixin,Word): pass

print(PrinttableWord.mro())     #   [<class '__main__.PrinttableWord'>, <class '__main__.PrintableMixin'>, <class '__main__.Word'>, <class '__main__.Document'>, <class 'object'>]
print(PrinttableWord.__dict__)  #   {'__module__': '__main__', '__doc__': None}
a = PrinttableWord("tom")
a.print()   #   PrintableMixin tom
Mixin 就是其他类混合进来,同时带来了类的属性和方法
这里看来 Mixin 类和装饰器效果一样,也什么特别的,但是 Mixin 是类,就可以继承,增强功能
class PrintableMixin:
    def print(self):
        print("PrintableMixin {}".format(self.content))

class Document:
    def __init__(self,content):
        self.content = content

    def print(self):
        print(self.content)

class Word(Document): pass

class Pdf(Document):  pass


class PrinttableWord(PrintableMixin,Word): pass

class SuperPrintableMixin(PrintableMixin,Word):
    def print(self):
        print("~"*30)
        super(SuperPrintableMixin, self).print()
        print("~"*30)

print(SuperPrintableMixin.mro())     #  [<class '__main__.SuperPrintableMixin'>, <class '__main__.PrintableMixin'>, <class '__main__.Word'>, <class '__main__.Document'>, <class 'object'>]
print(SuperPrintableMixin.__dict__)  #  {'__module__': '__main__', 'print': <function SuperPrintableMixin.print at 0x018264B0>, '__doc__': None}
a = SuperPrintableMixin("tom")
a.print()   #   ~~~~ ~~~~ ~~~~ ~~~~ ~~~~ ~~~~ ~~~~~~
            #   PrintableMixin tom
            #   ~~~~ ~~~~ ~~~~ ~~~~ ~~~~ ~~~~ ~~~~~~
总结
Minxin 本质上就是多继承实现的
Mixin 体现的是一种组合的设计模式
在面向对象的设计中,一个负载的类,往往需要很多功能,而这些功能有来自不同的类提供,这就需要很多的类组合在一起
从设计模式的角度来说,多组合,少继承。
- Mixin 类的使用原则
- Mixin 类中不应该显示的出现
__init__初始化方法 - Mixin 类通常不能独立工作,因为它是准备混入别的类中的部分功能实现
- Mixin 类的祖先类也应该是 Mixin 类
- 使用时,Mixin 类通常在 继承列表第一个位置
__new__ 和 __init__ 的区别
__new__ 创建 并返回类的实例(开辟一块内存地址)
__init__ 使用传入的参数来 初始化 该实例。
示例:
class Person(object):
    def __new__(cls, *args, **kwargs):
        print("in __new__")
        instance = object.__new__(cls, *args, **kwargs)
        return instance

    def __init__(self, name, age):
        print("in __init__")
        self._name = name
        self._age = age

p = Person("Wang", 33)
上面的代码输出如下的结果
in __new__
in __init__
__new__ 方法是静态方法,而 __init__ 是实例方法。
重写 __new__ 来实现单例模式
装饰器也可以用来实现单例模式
class Singleton(object):
    _instance = None
    def __new__(cls, *args, **kwargs):
        if cls._instance is None:
            cls._instance = object.__new__(cls, *args, **kwargs)

        return cls._instance

s1 = Singleton()
s2 = Singleton()
print(s1)
print(s2)
上面的代码输出
<__main__.Singleton object at 0x7fdef58b1190>
<__main__.Singleton object at 0x7fdef58b1190>
可以看到 s1 和 s2 都指向同一个对象,实现了单例模式。
重写 __new__ 来实现工厂模式
再来看下工厂模式的实现
class Fruit(object):
    def __init__(self):
        pass

    def print_color(self):
        pass

class Apple(Fruit):
    def __init__(self):
        pass

    def print_color(self):
        print("apple is in red")

class Orange(Fruit):
    def __init__(self):
        pass

    def print_color(self):
        print("orange is in orange")

class FruitFactory(object):
    fruits = {"apple": Apple, "orange": Orange}

    def __new__(cls, name):
        if name in cls.fruits.keys():
            return cls.fruits[name]()
        else:
            return Fruit()

fruit1 = FruitFactory("apple")
fruit2 = FruitFactory("orange")
fruit1.print_color()
fruit2.print_color()
上面的代码输出
apple is in red
orange is in orange
raise ... from ...
普通的 raise 语法
# raise
try:
    raise ValueError
except Exception as e:
    raise IndexError
"""
Traceback (most recent call last):
  File "raise.py", line 3, in <module>
    raise ValueError
ValueError

During handling of the above exception, another exception occurred:

Traceback (most recent call last):
  File "raise.py", line 5, in <module>
    raise IndexError
IndexError
"""
raise from 语法
# raise/from
try:
    raise ValueError
except Exception as e:
    raise IndexError from e
"""
Traceback (most recent call last):
  File "raisefrom.py", line 3, in <module>
    raise ValueError
ValueError

The above exception was the direct cause of the following exception:

Traceback (most recent call last):
  File "raisefrom.py", line 5, in <module>
    raise IndexError from e
IndexError
"""
raise A from B 语句用于 连锁 chain 异常。
from 后面的 B 可以是:
- 异常类
- 异常实例
None(Python 3.3的新特性)
如果 B 是异常类或者异常实例,那么 B 会被设置为 A 的 __cause__ 属性,表明 A异常 是由 B异常 导致的。
这样打印出来的异常信息就会包含这样一句话:The above exception was the direct cause of the following exception:。
关于单例模式
https://frostming.com/2025/singleton/
Protocol
PEP544
协议 (Protocol),也可称为静态鸭子类型,让 Python 类拥有类似 Go 中 Interface 的能力
from typing import Protocol

# 定义一个协议
class PaymentProcessor(Protocol):
    def process_payment(self, amount: float):
        pass

# 实现协议的类
class CreditCardPayment:
    def process_payment(self, amount: float):
        print(f"Processing Credit Card payment of {amount} dollars")

class PayPalPayment:
    def process_payment(self, amount: float):
        print(f"Processing PayPal payment of {amount} dollars")

# 使用协议
def make_payment(payment_processor: PaymentProcessor, amount: float):
    payment_processor.process_payment(amount)

credit_card = CreditCardPayment()
paypal = PayPalPayment()

make_payment(credit_card, 100)  # 输出: Processing Credit Card payment of 100 dollars
make_payment(paypal, 200)       # 输出: Processing PayPal payment of 200 dollars
- 在此例中,
PaymentProcessor是一个协议,任何实现了process_payment方法的类都自动符合该协议。我们不需要显式地声明类实现协议。
与 Protocol 类似的实现方法是使用抽象基类(ABC),但是需要子类显式地继承基类